How to Make Putty – Easy Homemade Putty Recipe
Creating homemade putty is a fun and engaging activity that entertains kids and stimulates their creativity and fine motor skills. This easy homemade putty recipe provides a simple and safe way to make your own putty using common ingredients. Whether you’re looking for a rainy day project, a hands-on science experiment, or a new way to play, this page will walk you through the steps to create a stretchy, squishy, and colorful putty that kids will love.
Get ready to dive into a world of sensory fun with this easy silly putty recipe!
How to Make Stress Putty

How to Make Putty – Easy Homemade Putty Recipe
This is a super therapy putty, not too soft and not too slimy; this DIY thinking putty is just right. There are so many benefits to playing with putty. Homemade Putty works hand muscles, keeps your brain focused, and calms you down, all while you smooth the putty through your fingers and hands. These are just a few amazing benefits for kids. This excellent putty recipe is a stress reliever for adults, too. We love sharing different How to Make Putty recipes with you. Have Fun!
Working with Putty is a life changer for many people. Whether you have a child with anxiety, special needs, sensory needs, or high stress, putty can help. You can stretch it, poke it, smooth it, tear it, squish it, and more.

Sensory Putty
Homemade therapy putty offers several benefits for children, making it a valuable tool for play and development.
Here are a few key advantages:
- Enhances Fine Motor Skills: Manipulating putty can help improve hand strength, dexterity, and coordination, which are essential for tasks like writing, buttoning clothes, and using scissors.
- Promotes Sensory Development: The tactile experience of squishing, stretching, and molding putty can be soothing and stimulating, helping children with sensory processing issues to explore different textures and sensations in a controlled way.
- Encourages Creativity and Imagination: Kids can shape and mold the putty into various forms, fostering creativity and imaginative play. This open-ended activity allows them to express themselves in unique ways.
- Reduces Stress and Anxiety: The repetitive motions of playing with putty can have a calming effect, helping children to relax and manage stress or anxiety. It can serve as a useful tool for emotional regulation.
- Improves Focus and Concentration: Using therapy putty can help children concentrate better on tasks by providing a physical outlet for excess energy. This can be particularly beneficial for children with attention difficulties.
- Cost-Effective and Customizable: Making putty at home is often more affordable than purchasing commercial therapy putty. Plus, you can customize the texture, color, and scent to suit your child’s preferences and needs.
By incorporating homemade therapy putty into your child’s routine, you can support their physical, sensory, and emotional development in a fun and engaging way.
How to Make Silly Putty
What you will need to make your homemade putty is in this picture below. However, I have it displayed in list form towards the bottom of the page. Have Fun!
affiliate links can be found on this blog at no cost to you.

DIY Putty

In small containers, put 1-2 tablespoons of glue in each bowl. Add a couple of drops of color and mix in. Make as many different colors as you like. To make a white putty, leave the glue in the bottle, and squeeze it out.

Put the cups of water in a large glass measuring cup or bowl. Add the Borax and stir it in. Let the water sit for a minute until it clears and you can see some of the borax lying at the bottom, which is the way it should look.

How to Make Putty with Glue
Use the stirrer or spoon to gently stir the water to get it moving, then add the glue quickly.

Hold the glue container about 12 inches above the water and squeeze it while moving the bottle back and forth a bit. The glue will look like long threads in the water.
After you put in about 2 tablespoons of glue, quickly use your spoon or stirrer to gather the glue into a lump and lift it out of the water.

Squeeze out the extra water from your putty, dry your hands, and then knead it for a few seconds. If it still feels sticky, dip it into the water for about 2 seconds, squeeze it out, and knead it again.

Repeat step 3 using your colored glues. Reuse the same water/borax solution you already made.

Putty


Perfect Therapy Putty Recipe

Putty Recipe
What’s Needed
- 1 Tbsp. Borax
- 4 cups Water (room temp)
- 1 Bottle Elmer’s White Glue
- Food Coloring, Assort. Colors
- Wood Skewer
Directions – How to Make Putty
1. In small containers, put 1-2 tablespoons of glue in each one. Add a couple of drops of color and mix in. Make as many different colors as you like. To make white putty, leave the glue in the bottle and squeeze it out.
2. Put the four cups of water in a large glass measuring cup or bowl. Add the Borax and stir it in. Let the water sit for a minute until it clears, and you can see some of the borax laying at the bottom which is the way it should look.
3. Use the stirrer to give the water a gentle, quick stir to get it moving a bit, and quickly add glue. Hold the glue container above the water about 12 inches and squeeze it while moving the bottle back and forth a bit. It’ll look like long threads in the water. After you put in about 1-2 tablespoons, quickly use your skewer to gather the glue into a lump and lift it out of the water. Squeeze out the extra water from your putty, dry your hands off, and then knead it for a few seconds. If it still feels sticky, dip it into the water for about 2 seconds squeeze it out, and knead it again.
4. Repeat step 3 using your colored glues. Reuse the same water/borax solution you already made.
5. Note: If your putty comes out like rubber and breaks instead of stretching, then the glue was in the water too long. A few seconds can make a big difference, so make sure you do not leave the glue in there too long.
DIY Putty is fun for kids to make and play with!
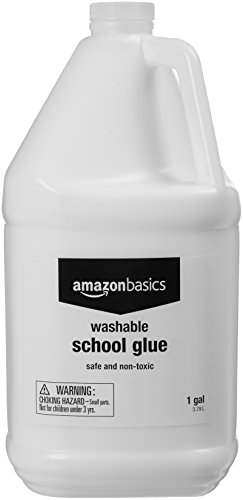
![Washable Liquid School Glue [Set of 3] Size: 1.25](https://m.media-amazon.com/images/I/5165qcqBskL._SL500_.jpg)


HOMEMADE PUTTY RECIPE

As you can see here, making homemade putty is a fun activity that offers numerous developmental benefits for children. This DIY putty recipe is easy to follow and provides a perfect way to create a versatile sensory play activity that kids will enjoy.
Whether used to enhance fine motor skills, promote sensory development, or simply have fun, this homemade putty is sure to be a hit. Gather your ingredients, follow the steps, and watch as your children dive into hours of creative and therapeutic play.

Homemade Putty Recipes
Studies have shown that if you like this, you will also love the following articles. I have pulled them together for you right here!
Make Your Own Putty
It’s easy, cheap, and an amazing sensory putty.

Click Over Here to Learn How to Make Edible Putty – Easy 2 Ingredient Recipe

The Best Putty Recipe


How to Make Putty at Home

How to Make Silly Putty Recipe for an Easy Theraputty that everyone loves
- 1 Tbsp. Borax
- 4 cups Water room temp
- 1 Bottle Elmer’s White Glue
- Food Coloring Assort. Colors
- Wood Skewer or spoon for stirring
-
In small containers, put 1-2 tablespoons of glue in each one. Add a couple of drops of color and mix in. Make as many different colors as you like. To make white putty, leave the glue in the bottle and squeeze it out.
-
Put the four cups of water in a large glass measuring cup or bowl. Add the Borax and stir it in. Let the water sit for a minute until it clears, and you can see some of the borax laying at the bottom which is the way it should look.
-
Use the stirrer to give the water a gentle, quick stir to get it moving a bit, and quickly add glue. Hold the glue container above the water about 12 inches and squeeze it while moving the bottle back and forth a bit. It’ll look like long threads in the water. After you put in about 1-2 tablespoons, quickly use your skewer to gather the glue into a lump and lift it out of the water.
-
Squeeze out the extra water from your putty, dry your hands off, and then knead it for a few seconds. If it still feels sticky, dip it into the water for about 2 seconds squeeze it out, and knead it again.
-
Repeat step 3 using your colored glues. Reuse the same water/borax solution you already made.
-
Note: If your putty comes out like rubber and breaks instead of stretching, then the glue was in the water too long. A few seconds can make a big difference, so make sure you do not leave the glue in there too long.